


In this Use Case, we are going to demonstrate how to visualize SCADA Alarms & Events from an SQL Database in PI Vision using AF Table+ from Vision Library+.
-
Install the necessary software:
- PI System Explorer: Ensure you have PI System Explorer installed on your computer. It's part of the OSIsoft PI System suite of software.
- SQL Server: Install SQL Server on your computer or ensure you have access to a SQL Server instance that contains the database you want to connect to.
-
Configure the SQL Server:
- Create a new database or identify an existing database that you want to connect to.
- Ensure the SQL Server instance is running and accessible from the computer where PI System Explorer is installed.
- Set up the necessary permissions and user accounts to access the database.
-
Configure PI System Explorer:
- Launch PI System Explorer on your computer.
- Navigate to the AF Server that you want to use for the connection.
- Right-click on "Database" under the AF Server and select "New Table Connection."
- In the "Table Connection Manager" window, enter a name and description for the connection.
- Select "Microsoft SQL Server" as the provider.
-
Configure the SQL Server connection:
- In the "Connection" tab of the "Table Connection Manager" window, enter the necessary details to connect to your SQL Server:
- Server: Specify the name or IP address of the SQL Server instance.
- Database: Enter the name of the database you want to connect to.
- Authentication: Choose the appropriate authentication method (e.g., Windows Authentication or SQL Server Authentication).
- User Name and Password: Provide the credentials if using SQL Server Authentication.
- Test the connection to ensure it's successful.
- In the "Connection" tab of the "Table Connection Manager" window, enter the necessary details to connect to your SQL Server:
-
Define the table and mapping:
- In the "Table" tab of the "Table Connection Manager" window, enter the table name you want to connect to or use the "Browse" button to select the table from the SQL Server.
- Define the table mapping by selecting the appropriate AF attributes and matching them to the corresponding SQL columns.
-
Configure additional settings:
- Customize any additional settings, such as defining filters, sorting, or adding any necessary transformations or calculations.
-
Save and test the connection:
- Click "OK" to save the table connection settings.
- Test the connection by right-clicking on the newly created table connection and selecting "Test Connection." This will verify that the connection is established and the table is accessible.
-
Configure PI Vision
- Go to your PI Visions Web Application
- Drag "AF Table Plus" Symbol onto your display
- In the configuration Pane, select the AF Server, AF Database and AF Table that you defined before
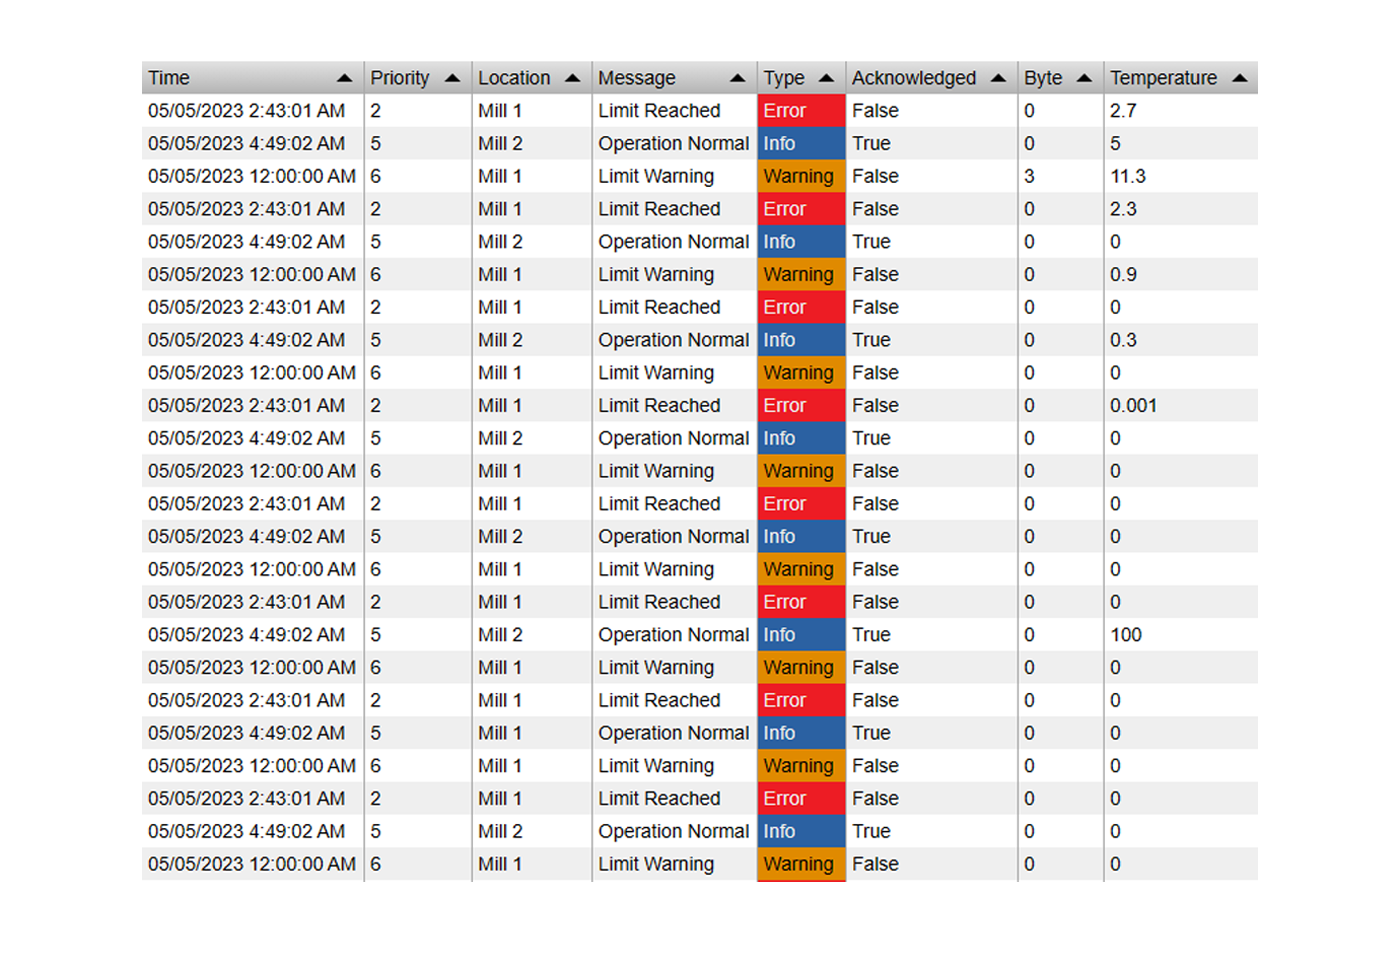
You should then see your Alarms and Events directly in PI Vision: