Heatmap+ for AVEVA PI Vision

PI Vision heatmap for daily patterns and outliers

See at a glance when a value runs high or low, day after day or across many data sources. Heatmap+ turns PI data into a colour grid in your PI Vision display.

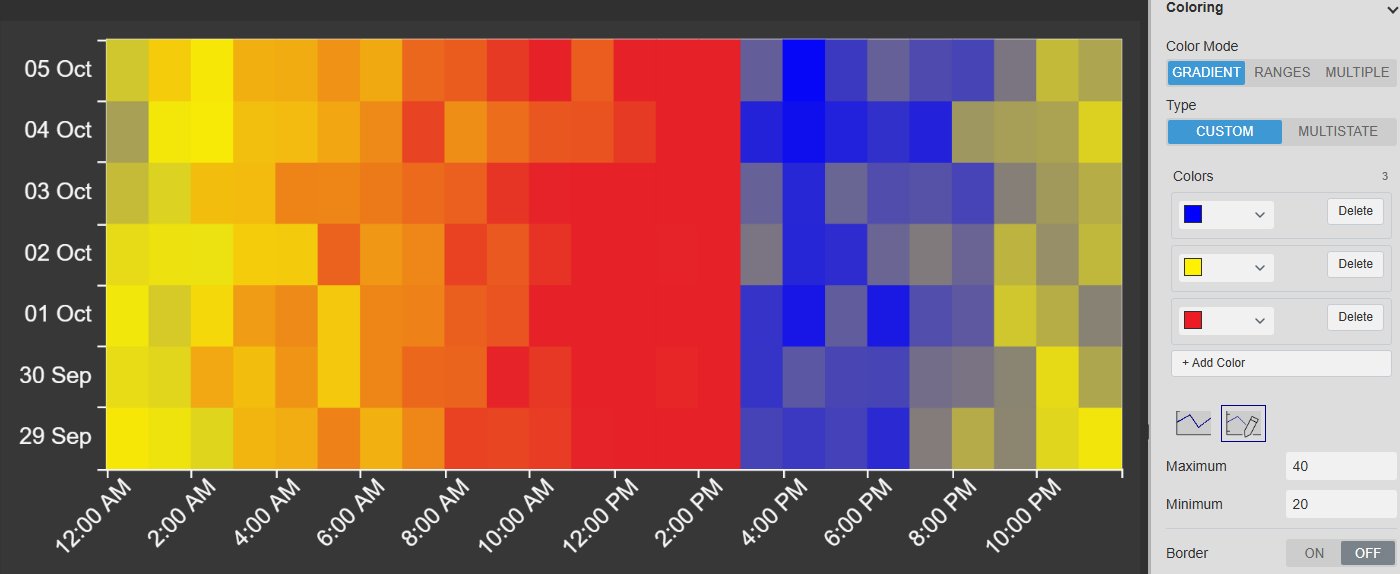
Heatmap+ in PI Vision showing hourly averages for seven days as a grid of days by hours, coloured from blue for low through yellow to red for high, next to the Coloring settings with Gradient mode, three colour stops and a custom minimum and maximum
Heatmap+ v2.0 in PI Vision: seven days of hourly averages on a blue, yellow and red gradient, next to the Coloring settings. Demo data. Select the image to enlarge.

PI Vision heatmap layouts for time patterns and data sources

Arrange the grid the way the question is asked: hours against days to see a daily routine, or one row per data source to compare equipment over the same hours.

Hours by day to spot recurring patterns

Group the rows by day and put the hours on the columns, so anything that repeats at the same time every day lines up in one column.

  • Rows grouped by minute, hour, day, week, month or year.
  • One summary value per cell, for example the hourly or three-hourly average.
  • Optional values in the cells, with their own number format and decimals.
  • Time labels in Auto, Relative or a fixed date and time format.
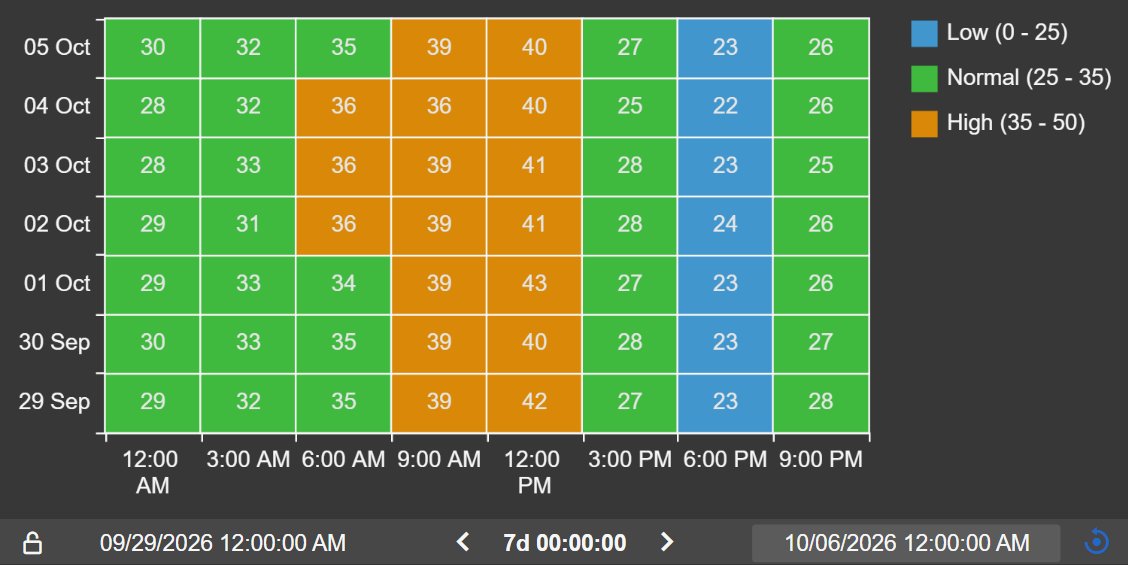
Heatmap+ with seven days as rows and three-hour columns from midnight to 9 PM, each cell showing its average value and coloured green, orange or blue by range, with a legend for Low, Normal and High and the Time Bar below showing a seven-day range
Seven days of three-hour averages with cell values, named ranges and the Time Bar. Demo data. Select the image to enlarge.

One row per data source

List several tags or attributes as rows and see at once which one runs high or low at the same time.

  • One row per PI point or AF attribute on a shared colour scale.
  • Column width from the summary interval, set automatically or by hand.
  • Pan, box zoom and step through time from the chart toolbar.
  • Position, title and inverted order on both axes.
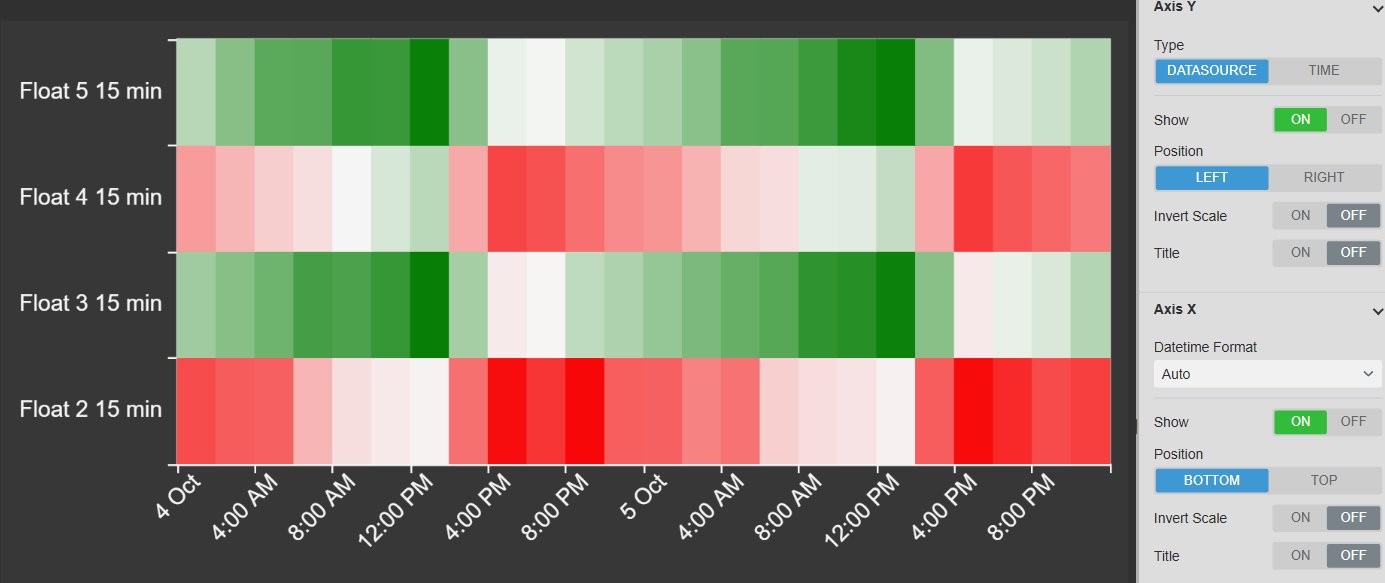
Heatmap+ with four data sources as rows and two-hour columns over two days, coloured from red for low through white to green for high, next to the Axis Y and Axis X settings with the Y axis type set to data source
Four data sources as rows over two days of two-hour averages, with the axis settings. Demo data. Select the image to enlarge.

Colour PI data by gradient, named ranges or PI states

Choose how colour carries meaning: a continuous scale for magnitude, named bands for the limits your team already uses, or the states of a digital tag.

Named ranges with a legend

Put every value into a named band such as Low, Normal or High, with no blending in between, and let the legend explain the colours.

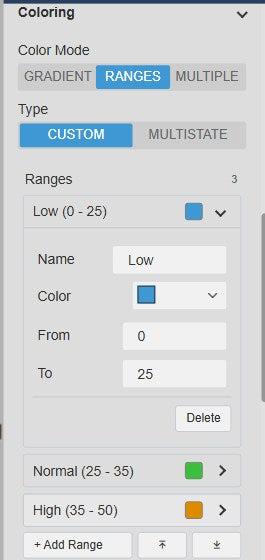
  • Name, colour, from and to for each range.
  • Legend with one row per range and its interval, placed top, left, bottom or right.
  • Gradient mode with any number of colour stops and an automatic or fixed minimum and maximum.
  • Optional cell borders and rounded cells.
Heatmap+ Coloring settings in Ranges mode with the Low range open showing name, colour, from 0 and to 25, and the Normal and High ranges listed below
Ranges settings with Low, Normal and High bands. Select the image to enlarge.

Digital states and multi-state colours

Colour the cells by the PI Vision multi-state you already use, or show the states of a digital tag directly in the grid.

  • Multi-state colours from the symbol’s Add Multi-State command.
  • Digital tags shown with their state names in the cells and the legend.
  • Interpolated values at a fixed interval, for example every two hours.
  • Cell labels switch to a contrasting colour on light and dark cells.
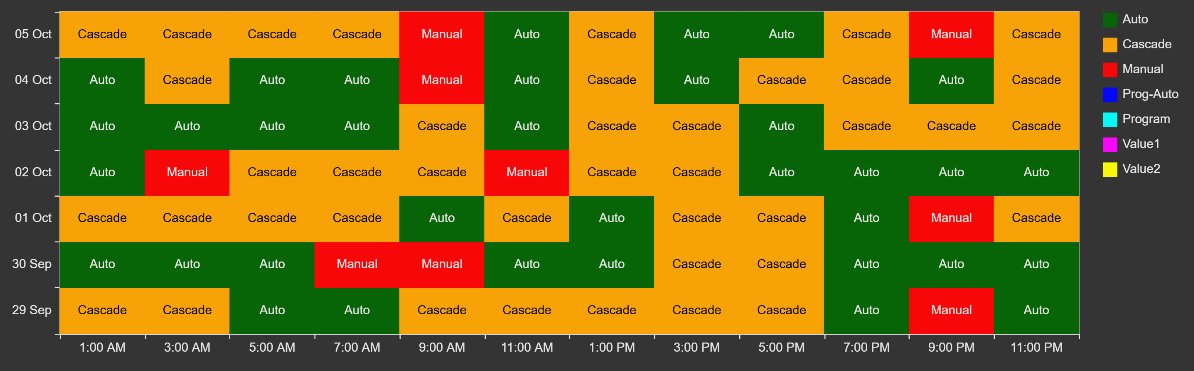
Heatmap+ with seven days as rows and two-hour columns showing the controller mode Auto, Cascade or Manual in each cell, coloured green, orange and red, with a state legend
Controller mode of a digital tag over seven days in two-hour steps, coloured by state. Demo data. Select the image to enlarge.

Heatmap data retrieval, Time Bar and export

Decide how each cell is calculated, give the heatmap its own time range and take the grid into a report or spreadsheet.

Summaries, interpolation and custom time ranges

Let the symbol calculate each cell from PI data, without extra AF analyses.

  • Summary: total, average, minimum, maximum, range, standard deviation, count or percent good, time- or event-weighted.
  • Recorded, interpolated or joined data, with an optional sync time.
  • Display time, a custom start and end, or a duration and offset.
  • Its own Time Bar with lock, previous and next, duration choices and PI time expressions.
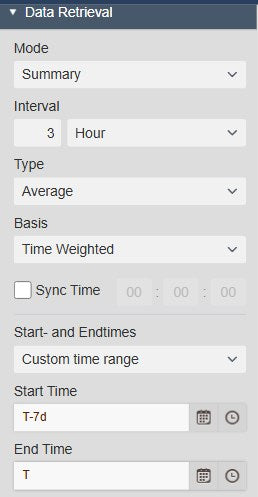
Heatmap+ Data Retrieval settings with Summary mode, a three-hour interval, Average, Time Weighted, sync time off and a custom time range from T-7d to T
Data Retrieval settings for three-hour averages over a custom seven-day range. Select the image to enlarge.

Toolbar, full screen and download

Zoom into a stretch of time, open the heatmap full screen in a review meeting, or export the cell values.

  • Pan, box zoom, zoom in, zoom out and reset when the rows are data sources.
  • Full screen keeps the current legend selection and zoom.
  • Download as PNG, SVG or PDF, or the cell values as CSV, JSON or XLSX.
  • Optionally apply a clicked cell’s time range to the display time.
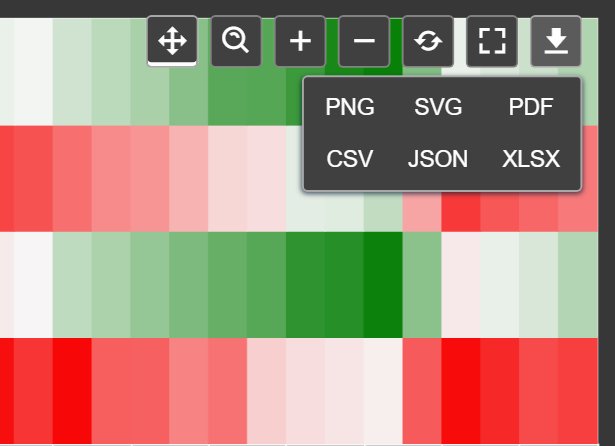
Heatmap+ toolbar with pan, box zoom, zoom in, zoom out, reset, full screen and download buttons above the grid, and the download menu offering PNG, SVG, PDF, CSV, JSON and XLSX
Toolbar with the download menu. Demo data. Select the image to enlarge.

PI Vision heatmap examples

Four common ways teams use Heatmap+ on their displays.

Daily load profile

Data
A flow, power or production rate
Settings
Rows grouped by day, hourly averages over one to four weeks
Shows
Which hours run high every day, and which days break the routine

Equipment comparison

Data
The same attribute on several pumps, lines or units
Settings
One row per data source, hourly or shift averages on a shared gradient
Shows
Which unit runs hotter, slower or emptier at the same time

Operating limits

Data
A temperature, pressure or quality value
Settings
Named ranges such as Low, Normal and High, values in the cells
Shows
When and how often the value leaves its normal band

Controller mode history

Data
A digital mode or status tag
Settings
Multi-state colours, interpolated every one or two hours
Shows
When loops ran in Manual or Cascade instead of Auto

Heatmap+ FAQ

Questions we are asked most often. Read the Heatmap+ documentation or ask a technical question.

How is Heatmap+ different from a PI Vision trend?

A trend shows a few values over time as lines. Heatmap+ turns many intervals into coloured cells, so repeating patterns, gaps and outliers across days or data sources are visible at once. Use a trend for detail and the heatmap for the overview.

Can Heatmap+ show hours against days?

Yes. Set the Y axis type to Time, group it by day and use an hourly summary interval. Each row is then one day and each column one hour. The rows can also be grouped by minute, hour, week, month or year.

Does Heatmap+ need AF analyses to calculate the cells?

No. In Summary mode the symbol requests the total, average, minimum, maximum, range, standard deviation, count or percent good for each interval directly from PI. Recorded, interpolated and joined data are also available.

Does clicking a cell change the display time?

Only if you switch on Apply to Display Time. A cell click then applies that cell’s time range to the display, and a zoom or pan applies the visible window. With it off, zooming and panning stay inside the heatmap.

What do we need to run it?

PI Vision 2021 or later with PI Web API, and PI AF Server 2018 SP2 or later. Heatmap+ runs in PI Vision and uses each user’s existing PI permissions.

How do we get Heatmap+?

Heatmap+ is part of Vision Library+, together with the other Vision Library+ symbols. Request a trial to test it in your own PI Vision environment.

Try Heatmap+ in your PI Vision

Heatmap+ is included in Vision Library+, the PI Vision custom symbol library from Software Athlete. Test it on your own displays and data.