



PI Nexus+ / Installation Guide
Open PI Nexus+ and Install the License
This chapter opens PI Nexus+ for the first time, checks the database connection and installs the license.
Overview
This chapter opens PI Nexus+ for the first time, checks the database connection and installs the license.
Sign in
Open http://localhost:5139/ on the web server, http://SERVERNAME:5139/ from another computer, or the PI Nexus+ shortcut. The first request starts the app, so the first page can take a moment.
PI Nexus+ signs you in with your Windows account. Until an Admin role is mapped to a Windows group, every local administrator of the web server has the Admin role. Sign in as one of them and open Admin.
Then map your administrators' group to the Admin role under Admin > Security (see Administration Overview in the Administration Guide). From then on, local administrators no longer get the Admin role automatically.
Note: If the Admin mappings are lost or wrong, run Admin\Recover-AdminAccess.bat in the program folder as an account that can write to the PI Nexus+ database. It asks for a Windows group, for example DOMAIN\PI Nexus Admins, and maps it to the Admin role.
Check the database connection
Admin opens on SQL Server.
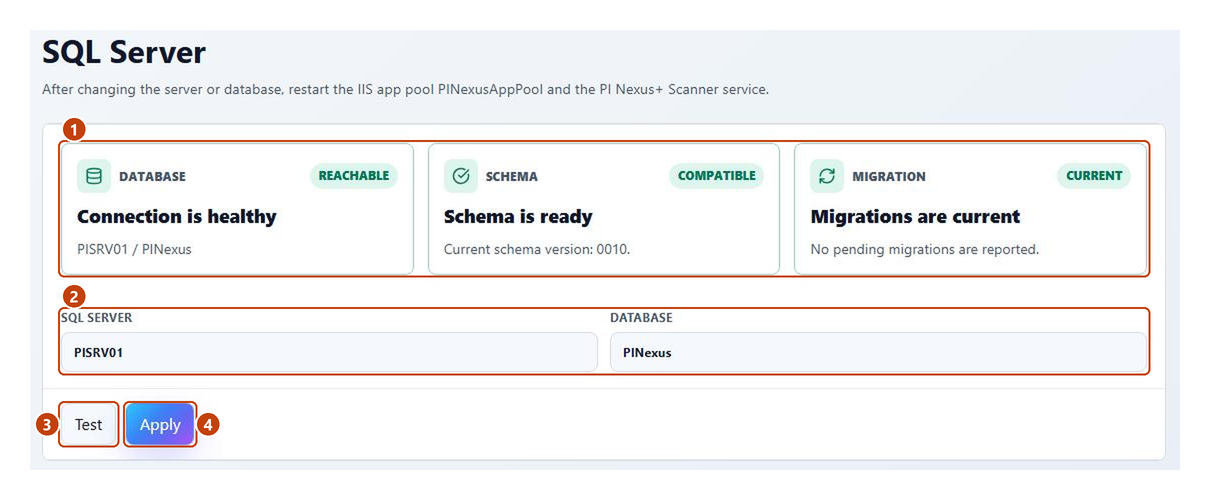
- Check that the cards read Reachable, Compatible and Current.
- Check that SQL Server and Database name your database.
- Choose Test if a card is not green.
- Choose Apply only to apply pending migrations or to switch to another database; then restart
PINexusAppPooland thePI Nexus+ Scannerservice.
Install the license
Software Athlete sends the license as a .license file or a key string. It names the PI Data Archives it covers and the number of PI Points.
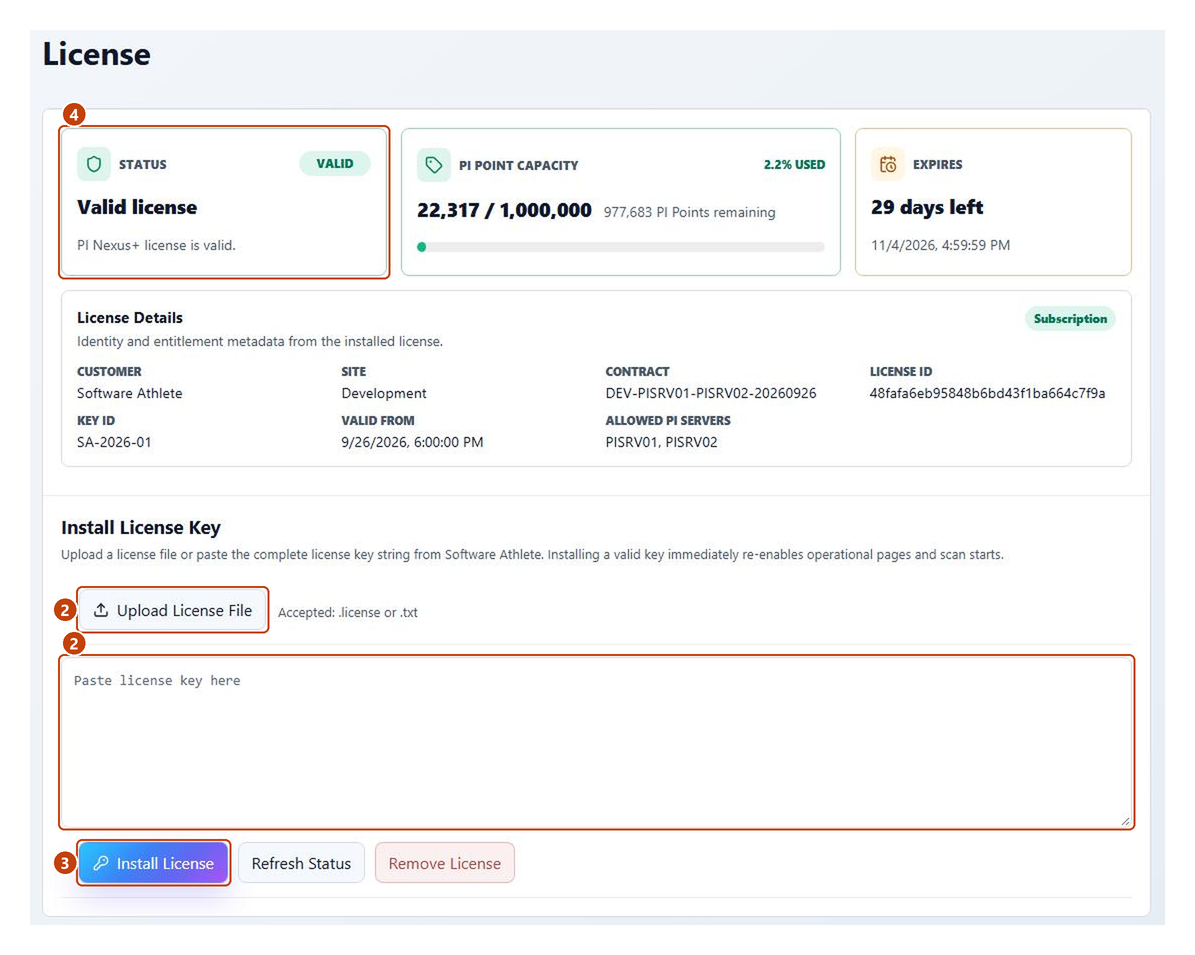
- Open Admin > License.
- Choose Upload License File, or paste the complete key into the key field.
- Choose Install License.
- Check that the status reads Valid license, and that the expiry date, PI Point capacity and allowed PI servers are as agreed.
A missing, expired or damaged license blocks scanning and the inventory pages. Too many PI Points, or an enabled PI Data Archive the license does not name, only limits scanning. Evaluation licenses are described in Getting Started in the User Guide.
Use HTTPS
The installer binds the site to plain HTTP. Readiness warns under Browser transport when PI Nexus+ is opened over HTTP from another computer. Add an HTTPS binding so users' sign-ins and data travel encrypted.
- Get a server authentication certificate for the name users type, for example
pinexus.example.com, and import it on the web server into Local Computer > Personal. - In IIS Manager, select the site PI Nexus+ and choose Bindings, then Add.
- Choose Type
https, the Port (443 unless you use another), optionally the Host name, and the certificate. Choose OK. - Allow the HTTPS port inbound on the web server's firewall.
- Open
https://<name>/from another computer. Windows sign-in works as before: authentication is set per site, not per binding, so leave Windows Authentication on and Anonymous Authentication off. - Open Admin > Support > Readiness over the new address and check that Browser transport is Good.
- Give users the new address, and update their bookmarks and any links you shared.
Keep the HTTP binding: the Start menu and desktop shortcuts on the web server use http://localhost:<IISPORT>/, which the readiness check accepts. To stop plain HTTP from other computers, close that port in the firewall. Upgrades and repairs keep your bindings. No PI Nexus+ setting names the address or the scheme.
Reference: License States


