



Vision Library+ / Tables and monitoring
Events Table+
Events Table+ displays event-frame search results with filtering, grouping, editing, comparison, and export tools.
Overview
Events Table+ displays event-frame search results with filtering, grouping, editing, comparison, and export tools.
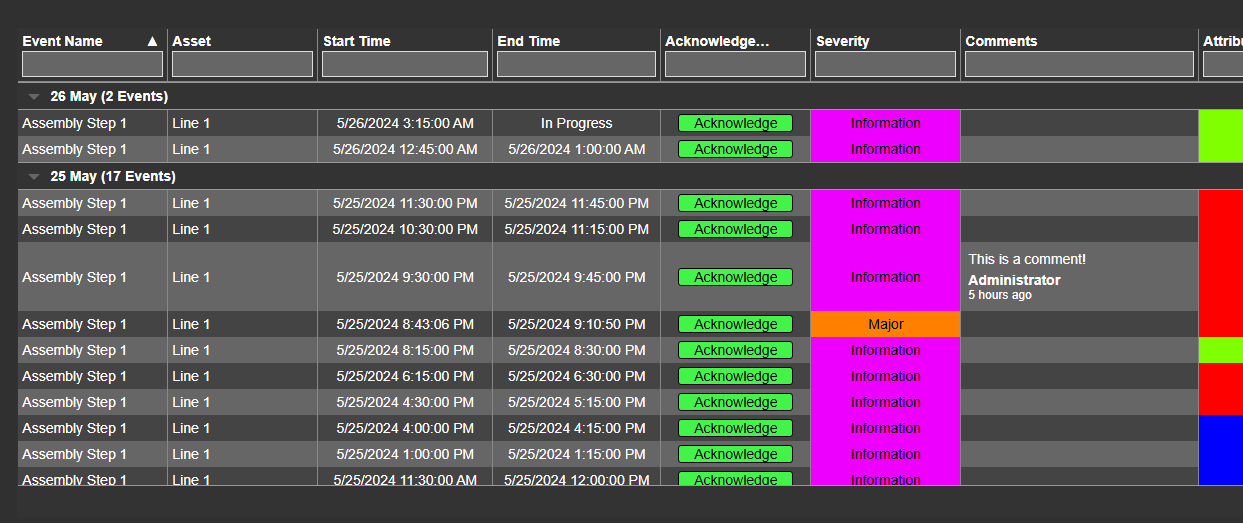
Watch the demo
See Events Table+ in a practical PI Vision workflow.
When to use it
Use this symbol when you need to:
- Monitor and investigate event frames in a configurable table.
- Allow authorized users to review, create, edit, or compare event records.
Before you begin
- Prepare an event-frame template and search that returns the intended events.
- Confirm permissions and audit requirements before enabling event edits.
Add and set up the symbol
- Select the symbol in the PI Vision symbol gallery.
- Add the required data sources or asset context to the display.
- Right-click the symbol and open its configuration pane.
- Configure the minimum data, range, and display settings for a useful result.
- Confirm that the symbol shows the expected data.
Create symbol
To create an Events Table+ symbol:
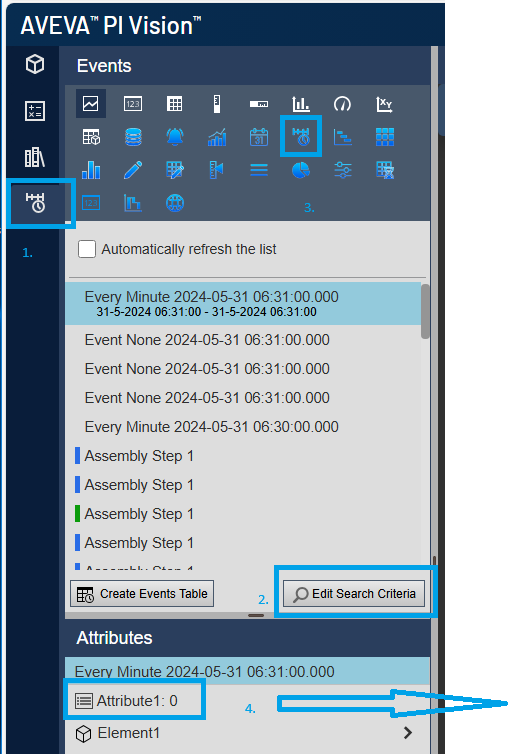
- Open PI Vision’s event frame toolbar.
- Click Search Criteria and find the event frames you want to display.
- Select the Events Table+ symbol.
- Drag any attribute of the event frame onto the display.
Use the symbol
Use search, filters, groups, paging, and quick actions to locate an event. Create, edit, split, copy, or delete actions change event-frame data and require the corresponding permissions.
Open a trend for an event
While viewing the display, right-click an event row and choose Open Popup Trend from Row. PI Vision opens its native popup trend for the table's configured attributes, using the event's start and end times. An event still in progress is trended through the current time.
Referenced-element attributes use the asset's attribute paths. Event attributes that expose an underlying source attribute use that signal, so an event summary can open the original process history. Attributes that cannot be resolved are skipped; if none can be resolved, the table shows a notification.
Read only vs. edit mode
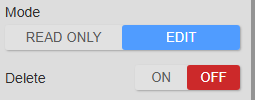
The most significant enhancement over the default Events table is the ability to write data back to the PI System. In the Interactivity section, choose between Read Only and Edit mode.
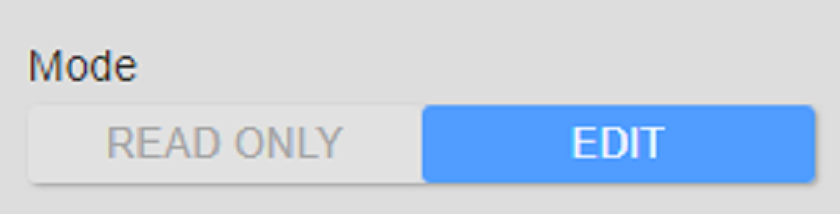
- Read Only: Event frames are displayed but cannot be edited.
- Edit: Event frames can be modified, updated, or deleted.
Switching to Edit mode makes all columns editable by default, including basic event frame properties such as Name, Start Time, and End Time, as well as static event frame attributes.
To restrict editing to specific columns, open the column configuration and disable the Allow Edit setting for those you want to keep read-only.

The mode also affects how PI Point attributes are displayed:
In Read Only mode, the table behaves like the default Events table: it always shows a value for the PI Point, even if no data point falls within the event frame's time range. The displayed value is the most recent recorded value, or an interpolated value if the Step property is disabled.
In Edit mode, only data points that fall within the event frame's time range are shown. To also show values from outside that range, enable the Prev. Value property.
Prev. Value: When enabled, shows PI Point values from outside the event frame's time range. When disabled, cells with no in-range data point are left blank.
Auto Save: Saves each update immediately, without requiring the operator to select Save.
The following options are available for the individual properties if the table is in Edit Mode:
Allow Edit: Whether the cell can be edited
Highlight Input Cells: Highlights editable cells to distinguish them from read-only cells. Options are None (no highlighting), All (highlight all editable cells), or Empty (highlight only empty editable cells).
Timestamp: Set the save timestamp of a column to Start or End to save the value at the event frames start or end time.
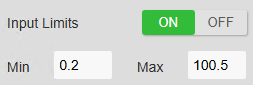
Input Limits
For numeric attributes, input limits can be configured to prevent users from entering values outside a defined range.
Updating basic event data
The following event frame properties can be edited directly in the table: Name, Description, Asset, Start Time, End Time, Reason, and Severity.
User Logging
For String attributes, user logging can be enabled by setting the Auto Value property to User. When active, the current user's name is automatically written to that attribute whenever the event frame or any of its attributes are saved.

Updating attribute data
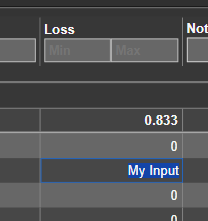
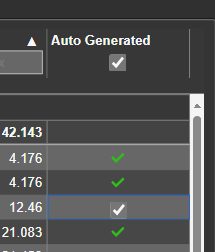
In Edit mode, attribute columns become editable. The input control shown depends on the attribute's data type:
- Strings & Numbers: A standard text input field.
- Boolean: Checkbox
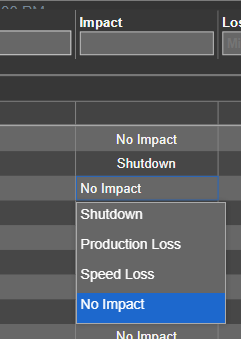
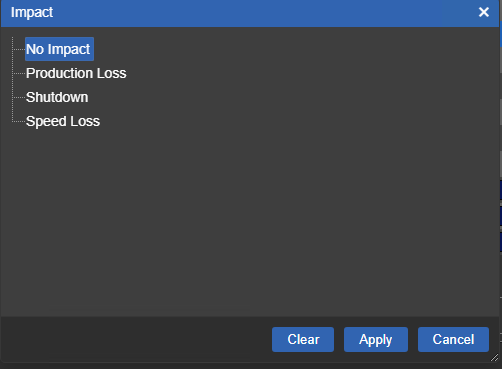
- Enumeration Values / Digital Sets: Configurable as either Dropdown (a compact menu inside the cell) or Dialog (a separate selection window).
Dropdown Dialog
Saving
Changes are staged locally and only sent to the PI System when the user clicks Save.
To discard all unsaved changes, click the Refresh button next to Save.
Live filtering and searching
When Column Filters are enabled in the General configuration section, users can type in any column header to filter event frames in real time:
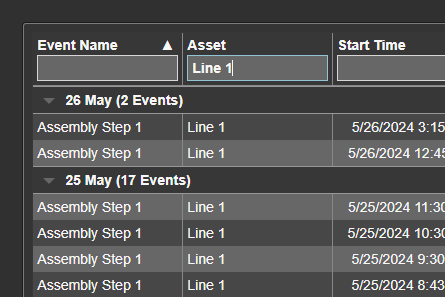
Grouping
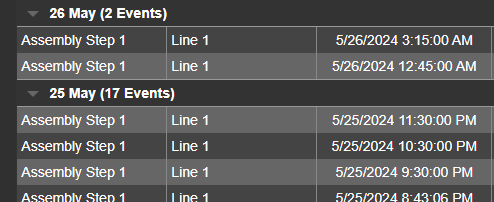
In the Columns configuration section, select any column and enable the Group checkbox to group event frames by that property. Multiple columns can be grouped simultaneously, including Start Time and End Time.
Paging
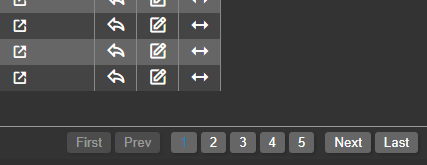
Paging replaces continuous scrolling with numbered pages. To enable it, open the configuration pane and check the Paging checkbox in the General section.
Column totals
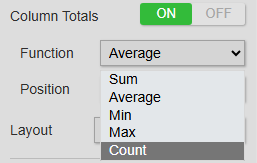
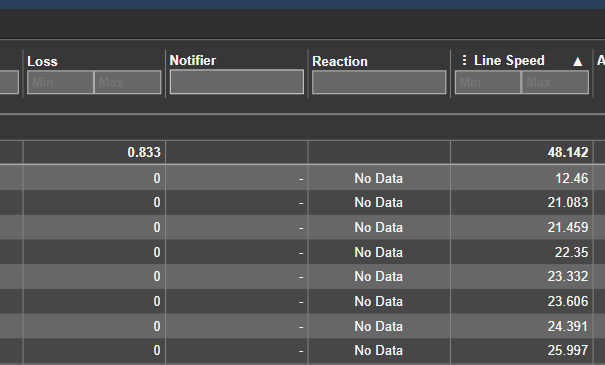
Column Totals can be enabled for event frame attributes in the configuration pane. The following aggregate functions are available: Sum, Average, Min, Max, and Count.
Compare event data
When event frame attributes are linked to PI Points, users can compare time-series data across different event frames. Click a cell and select Compare to add that event to the comparison chart. Note that editing must be disabled on the column to use this feature.
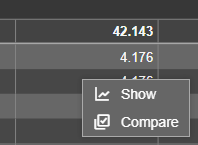
This opens an ad-hoc chart displaying the selected tag's data normalised by time. Clicking additional cells and selecting Compare adds those event frames to the chart for side-by-side batch comparison:
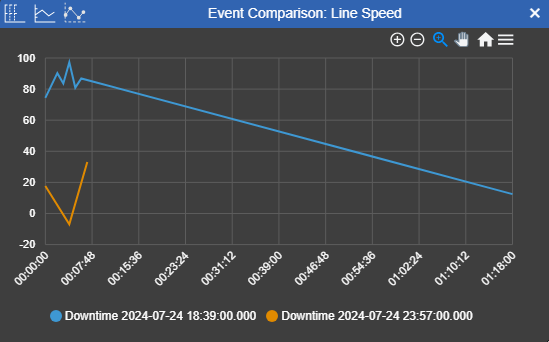
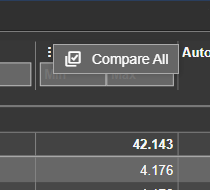
To compare all tags in a column at once, click the three-dot menu in the column header and select Compare All.
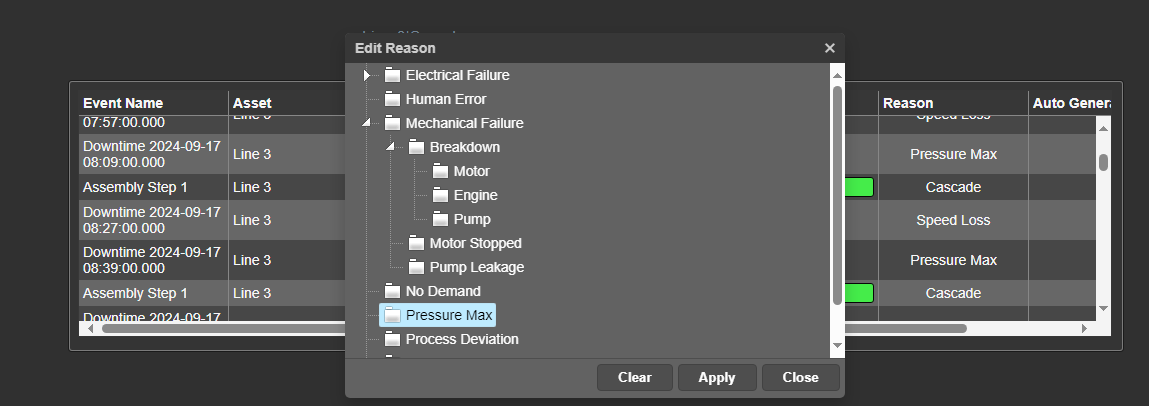
Edit reason code
When the Reason Trait is configured in the event frame template, users can edit the reason code by clicking the Reason cell for the relevant event frame.
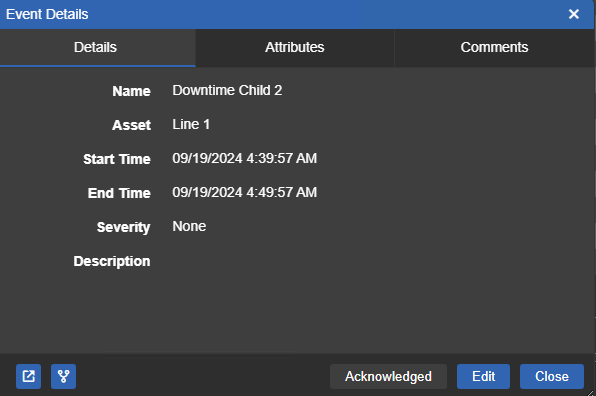
Event details window
When the Event Select property in the Interactivity menu is set to Open Dialog, clicking an event frame opens the Event Details window, which shows all event frame information, attribute values, and comments.
- Details
The Details tab shows all relevant event frame information. Users can also acknowledge or edit the event frame from this view.
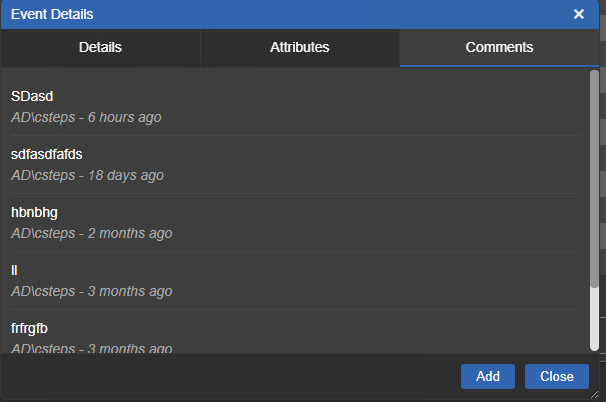
- Comments
The Comments tab lists all comments on the event frame and lets users add new ones.
- Attributes
The Attributes tab lists all relevant event frame attributes and their current values.
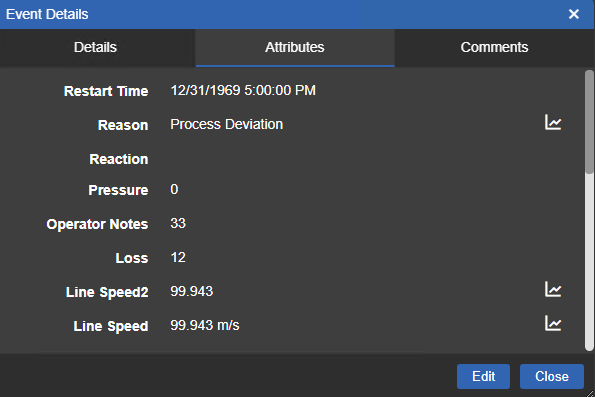
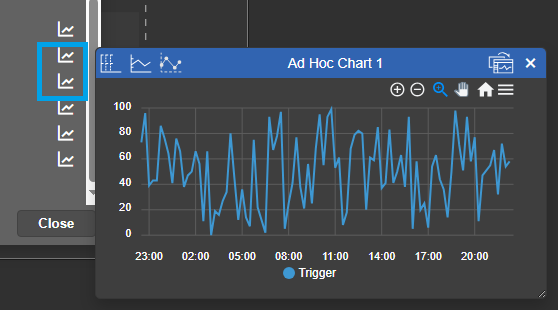
Click the chart icon next to an attribute to view its trend over the event frame's time range.
Editing event frames and attributes
Event frames and static attributes can be edited in two ways:
- In the table: Switch the Events Table+ to Edit mode.
- Event Details Window: Supports editing both the event frame and its attributes.
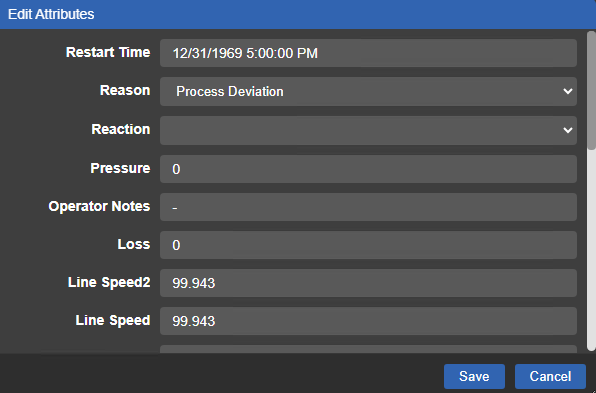
Important: Editing event frame attributes in the Event Details Window requires the Manual Data Entry flag to be enabled in the AF Attribute configuration.
Split event frames
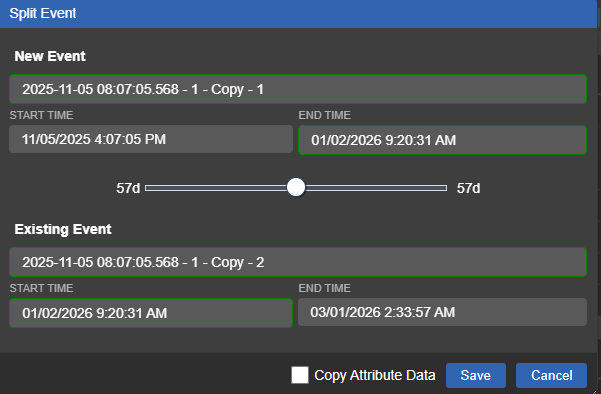
Use the Split Event quick action button, or select Split Event from the Event Details Window menu, to divide an event frame into two.
The split point defaults to the midpoint of the event, but can be adjusted with the slider. On save, the original event's start time is updated and a new event is created (as completed) with the star time set to the original start time, and the end time being the split time. So if you for example split an in progress event, that original event will stay in progress, but have its start time updated.
Enable Copy Attribute Data to also carry over the source event attribute data to the new event.
Copy event frames
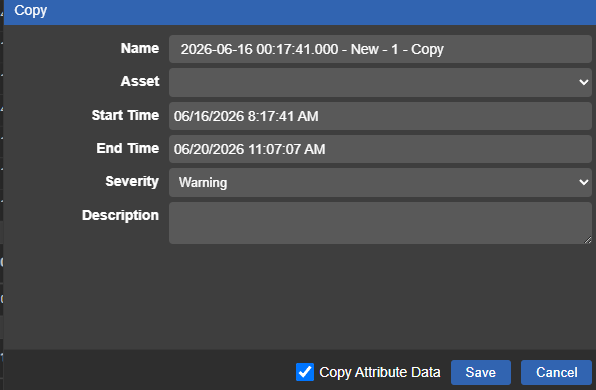
The Copy Event button creates a duplicate of the selected event frame. Before the copy is created, basic properties (Name, Start Time, End Time, Severity, and Description) can be adjusted. Attribute values are carried over from the original.
Enable Copy Attribute Data to also carry over the source event attribute data to the new event.
Show child event frames
To display child event frames, open the Child Event Frames section in the configuration pane:
- Show: Enables the child event frame tree.
- Layout: Choose between Tree and List views. List is recommended when using column filters to search for specific child event frames, as Tree view always includes parent event frames in filtered results.
- Auto Expand: When enabled, child event frames are expanded automatically on load.
- Level: Sets the maximum depth to which child event frames are expanded.
Quick actions
Events Table+ replaces the default right-click context menu with Quick Actions - single-click buttons that appear directly in each row.
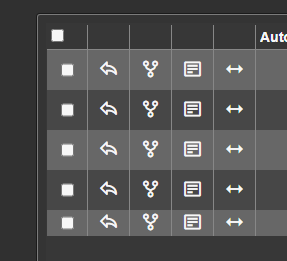
The following quick actions are available:
- Event Details: Opens the default PI Vision event details page in a new browser tab.
- Open Dialog: Opens the Event Details Window.
- Apply Time Range: Sets the display time range to match the event frame's time range.
- Set Asset Context: Updates the current display's asset context to the event's referenced asset.
- Split Event: Opens the Split Event dialog.
Time bar
Events Table+ supports the shared Time Bar for an independent Event Frame search range. Its duration options can also carry the interval used by compatible retrieval modes.
Export data
Right-click the table and select Export Data to export all event frame data. Supported formats: CSV, JSON, XLSX, and PDF.
Configure the symbol
Overview and behavior
The Events Table+ is an enhanced version of the default PI Vision Events table, adding filtering, grouping, export, and full event frame editing capabilities.
Because the symbol shares most behavior with the default PI Vision Events table, the sections below focus on the enhancements and differences.
Improvements compared to default events table
Events Table+ supports all standard Events Table features and adds the following:
Description and comment columns
Event frame descriptions and comments can be shown directly in the table. To enable either column, select it in the Columns list and check the Enabled box.
For the comment column, choose how comments are displayed:
- All Comments / Last Comment:
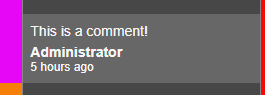
- Count (displays the number of comments; hover to see them as a tooltip):
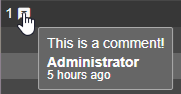
Clicking a comment cell opens the comment dialog, where additional comments can be added to the event.
Increased data limit
Events Table+ supports up to 10,000 events. The default limit is 900 events, which reflects the PI Web API's default maximum. To increase this limit, ask your PI Administrator to update the PI Web API configuration as described in the Vision Library+ Administration and Installation Guide.
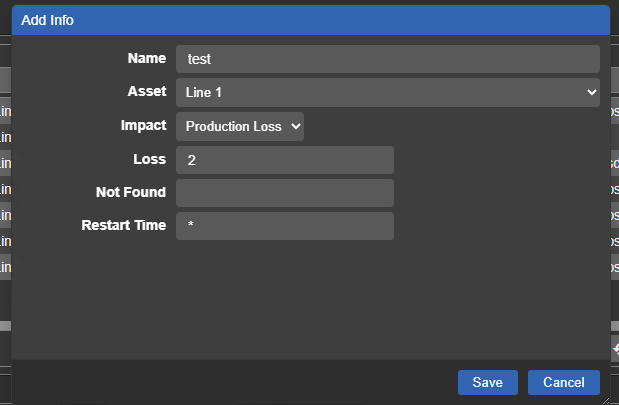
Configure event creation forms
To enable event frame creation, set the table to Edit mode. The Creation section then becomes visible in the configuration pane - check the Enabled box to activate it.
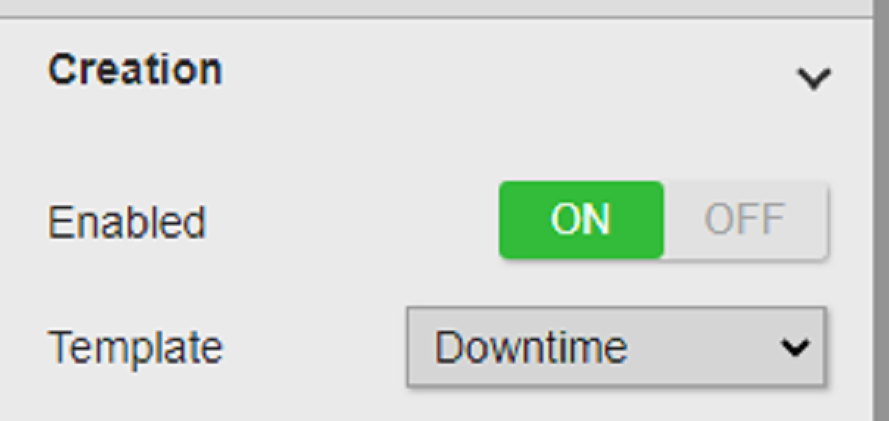
Next, select the source from which available Assets are drawn.
Define one or more creation buttons - each button triggers a specific input form and is fully configurable.

Click the + button to add a new creation button. For each button, configure the event frame template and the input fields (event properties or attributes) to show in the form:
- Title: Sets the button label.
- Color: Sets the button's background color.
- Open Dialog: When enabled, a creation form is shown to the user before the event is created. When disabled, the event is created silently in the background using the default values defined below - ensure all required properties have defaults set.
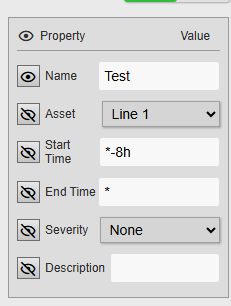
- Properties: Set default values for event frame properties. Use the eye icon to show or hide each field in the creation form.
- Attributes: Select the attributes to include in the creation form from the dropdown. Their values are written back to the PI System once the event is created. To capture the current user, assign %user% as the value for any String attribute.
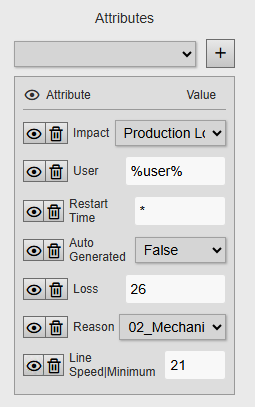
Clicking any creation button opens the input form as configured:
Filtering and linked row selection
Events Table+ can receive Master and Linked filters and can publish selected rows through Linked outputs. In Filtering > Output, add a channel and select the source property to publish. Configure Selection as Single or Multiple, then choose Filter as the row click action or use the filter quick action.
Checkbox changes and row clicks use the same authoritative row selection. In Multiple mode, every change republishes the complete distinct value set; clearing the final row clears the channel. If Range Selection is enabled, linked output and row-filter selection are unavailable because a cell range is not an event-row selection.
Under Filtering > Input, map a publisher's channel to this table's target property. Incoming filters are applied to the Event Frames already loaded by this table. See Filtering dashboards for the complete setup, matching rules, and search limitations.
Troubleshooting and limitations
- Check: If events are missing, verify the event search, template, time range, paging, and active filters.
- Check: Editing and creation are available only to authorized users and supported event templates.



