



Vision Library+ / Data entry
Manual Data Entry+
Manual Data Entry+ lets authorized operators enter, validate, import, and review time-series values in a grid.
Overview
Manual Data Entry+ lets authorized operators enter, validate, import, and review time-series values in a grid.
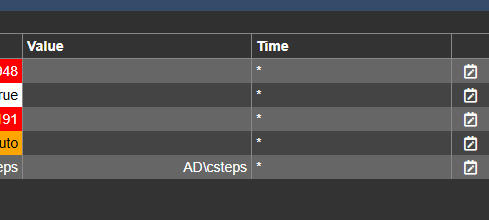
Watch the demo
See Manual Data Entry+ in a practical PI Vision workflow.
When to use it
Use this symbol when you need to:
- Record several values or timestamps for one or more PI Points.
- Import or paste a structured block of manual observations.
Before you begin
- Prepare writable PI Points with the correct point types and security.
- Confirm validation limits, audit requirements, and timestamp rules.
Preparing tags
Before placing and configuring the Manual Data Entry+ symbol, ensure that each PI Point used for manual data entry is configured correctly. Two point attributes in particular must be reviewed:
- Compression: Disable compression on every tag used for manual data entry. If compression is left enabled, the PI compression algorithm may discard manually entered values that fall within the existing exception and compression deviation bands.
- Step: For numeric PI Points, set the Step attribute to On. If Step is Off, the PI System will linearly interpolate between stored values, which can produce misleading results when manually entered values are displayed in trend or table symbols.
Add and set up the symbol
- Select the symbol in the PI Vision symbol gallery.
- Add the required data sources or asset context to the display.
- Right-click the symbol and open its configuration pane.
- Configure the minimum data, range, and display settings for a useful result.
- Confirm that the symbol shows the expected data.
Use the symbol
Enter or paste values, review validation messages, then save the accepted rows. Saving writes data to the PI Data Archive and may record the operator identity and reason.
Enter data
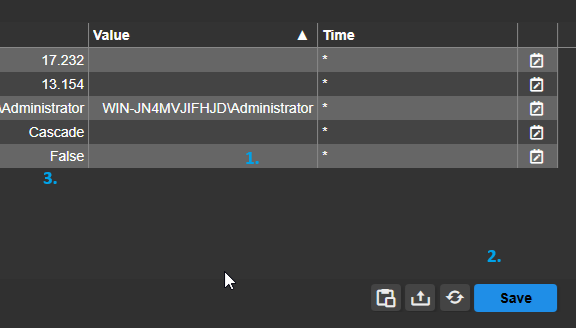
Each row in the table corresponds to a configured data source. To write a new value to a data source:
- Type the new value into the Value column (1).
- Click Save (2) to commit the value to the PI System.
- If the write was successful, the new value appears in the Last Value column (3) and the input field is cleared or pre-filled according to the configured Prefilled Value setting.
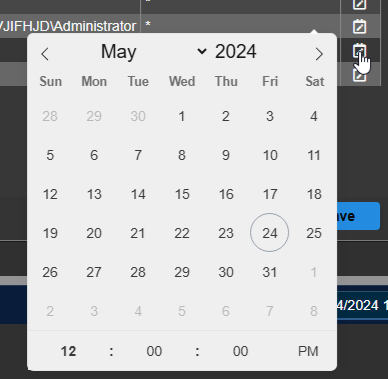
By default, values are written with the AF time expression * (current time). To write a value with a different timestamp:
- Type an absolute date/time or an AF time expression directly into the Time column.
- Use the date/time picker control in the adjacent column to select the timestamp interactively.
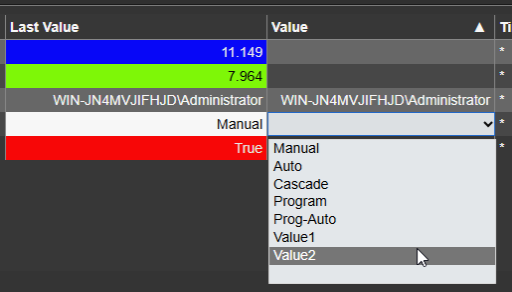
The input control rendered in the Value column depends on the data type of the PI Point or AF Attribute:
- String, Float, Integer - Free-text input field.
- Boolean, Enumeration Set - Drop-down selector showing available states.
Input validation
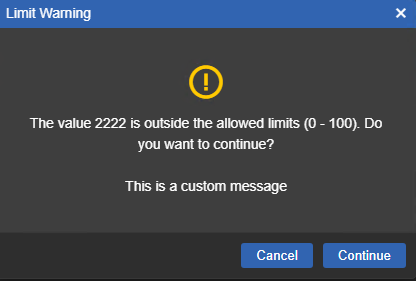
Input Validation can be enabled for numeric data sources. When active, the symbol checks the entered value against configured limit ranges. If the value falls outside the valid range, a warning dialog is displayed before the save is allowed to proceed.
Limits can be sourced from the PI System (Database) or defined manually (Custom). When Database is selected, the symbol reads the Minimum and Maximum Attribute Traits configured in Asset Framework, or the Min and Max point attributes for PI Points.
The Prevent Entry Outside Limits option controls whether the operator can proceed with saving a value that fails validation. When enabled, the save is blocked until the operator enters a value within range.
A custom message can be configured to provide context-specific guidance to the operator when the validation warning is triggered.
User logging
User logging records the name of the operator who submitted a value by writing it to a dedicated string PI Point or AF Attribute. This creates an audit trail linking each manual entry to the responsible operator. To configure user logging:
- Drag a string-type PI tag or AF Attribute onto the symbol to add it as a data source row.
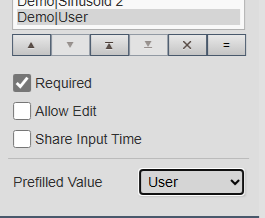
- In the configuration pane, set the Prefilled Value for that data source to User.
- (Optional) Enable the Required checkbox to prevent the operator from saving unless the user name field is populated.
- (Optional) Disable the Allow Edit checkbox to make the user name field read-only. This prevents operators from manually overwriting the auto-populated name.
Import data
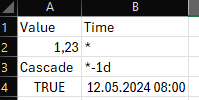
Values can be bulk-imported from a CSV file rather than entered row by row. The symbol expects a specific two-column file format. To import data:
- Prepare a spreadsheet or CSV file with exactly two columns:
- Value - The value to be written to the PI System.
- Time - The timestamp at which the value should be archived. Accepts absolute date/time strings or AF time expressions.
- Save the file in CSV format (.csv).
- Click Import CSV in the symbol toolbar and browse to the prepared CSV file.
- Review the imported rows in the table, then click Save to write the values to the PI System.
Paste data from clipboard
- Prepare a spreadsheet with two columns in the order: Value and Time. The data must be arranged in these columns for the paste operation to map correctly.
- Select the data range to paste and copy it to the clipboard (Ctrl+C).
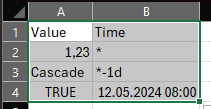
- Switch to the PI Vision display, then click Paste in the symbol toolbar. The imported rows are added to the table. Click Save to commit the values to the PI System.
Ad-hoc trend
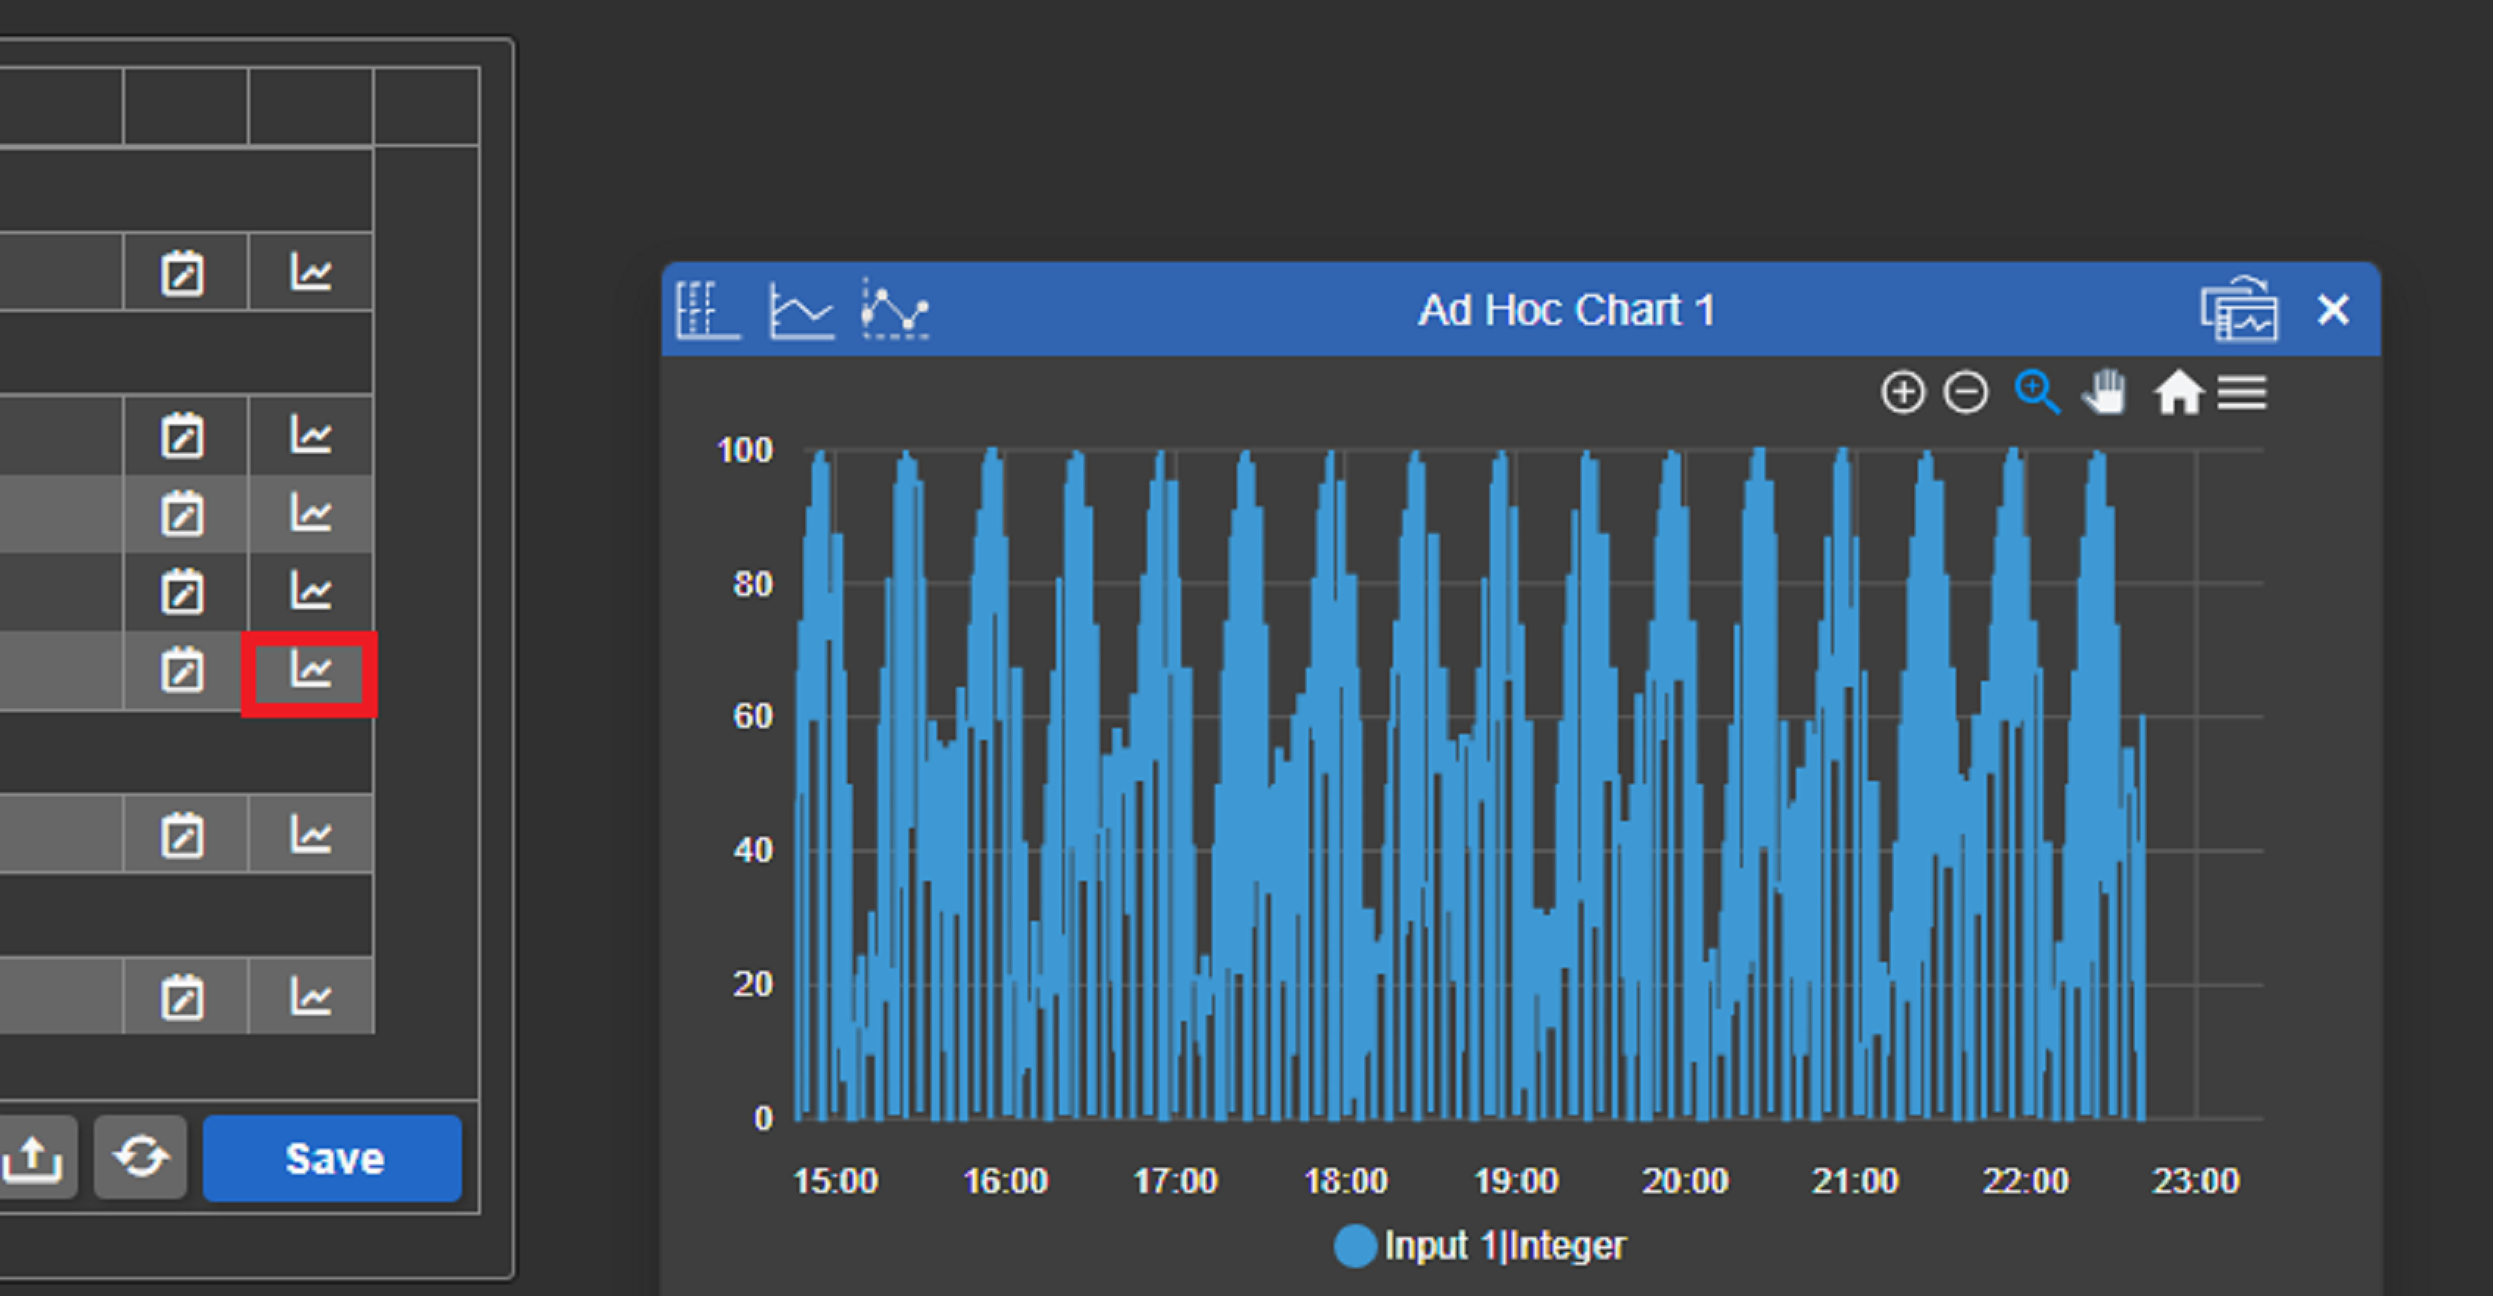
When the Trend checkbox is enabled in the Columns configuration section, a trend icon is added to each data source row. Clicking this icon opens an ad-hoc trend for the selected data source, overlaying a mini-trend chart without navigating away from the display. This allows operators to quickly review the historical context of a value before making a manual entry.
Configure the symbol
Overview and behavior
Manual Data Entry+ enables operators to write individual timestamped values directly to PI Points or AF Attributes from within a PI Vision display. Each configured data source appears as a row in the symbol's table. Values are staged in the input fields and committed to the PI System when the operator clicks the Save button.
Manual Data Entry+ is suited to scenarios where values are entered one row at a time - for example, a daily lab reading, a shift-end meter reading, or an operator log entry. For bulk tabular entry or immediate (no-save) writing, refer to Manual Input Table+ or Quick Input+ respectively.
Configuration
Open the configuration pane to control all aspects of the symbol: data sources and row settings, input behavior, column visibility, table style, number formatting, and toolbar options.
- Right-click the symbol on the display and select Configure Table to open the configuration pane.
- Under Rows, configure the data sources displayed in the symbol. The following properties are available for each data source:
- Required
When enabled, the operator must enter a value for this data source before the Save button becomes active.
- Allow Edit
When disabled, the data source is read-only and the value cannot be edited by the operator. Use this option to display reference values alongside editable fields.
- Share Input Time
When enabled, the timestamp entered in one row's Time column is applied to all other rows, ensuring all values in the table are saved with a common timestamp.
- Alignment
Select a data source under Rows, then choose its Alignment. This setting controls its Value and Last Value cells.
| Option | Behavior |
|---|---|
| Auto (default) | Aligns string values to the left, or to the right when Right to Left is enabled. Numbers and other value types remain right aligned. |
| Left | Aligns values to the left, regardless of data type or display direction. |
| Center | Centers values. |
| Right | Aligns values to the right, regardless of data type or display direction. |
The chosen alignment applies while typing, including in an empty input, and after leaving the cell. It follows the data source when rows are reordered and applies to its value columns when multiple input is transposed.
Existing displays without an alignment setting use Auto. Explicit alignment choices are preserved.
- Prefilled Value
Controls the value that is pre-populated in the input field when the symbol loads or after a save operation. Options:
| None | The input field is left blank on load and after each save. |
| User | Automatically populates the field with the currently logged-in PI Vision user name. Supported on string-type data sources only. |
| Last Value | Pre-populates the field with the most recently stored value for that data source. |
| Custom | Pre-populates the field with a static value defined by the display engineer. |
- Under Input, configure general entry behavior that applies to all rows in the table:
- Input Mode: Controls how many input fields are displayed per data source.
Single - Displays one input field per data source. The operator enters a value and an optional timestamp, then saves. This is the standard entry mode.
Multiple - Displays a series of input fields per data source, each corresponding to a pre-defined time interval (for example, hourly or daily slots). The layout can be transposed so that timestamps appear as rows rather than columns. Interval parameters are configured in the Configure Multiple Input section.
- Existing Data Rule: Determines the behavior when a value is submitted for a timestamp that already has an archived value.
- Replace Existing - Overwrites the existing archived value with the new entry.
- Add as Duplicate - Stores the new value alongside the existing entry at the same timestamp. Both values are retained in the PI archive.
- Protect Existing - Blocks the save operation if an archived value already exists at the specified timestamp. The operator must change the timestamp before saving.
- Configure Single Input - Use the following settings to control the default timestamp pre-populated in the Time column when Single input mode is active.
- Default Time: Sets the value pre-filled in the Time column when the symbol loads. Available options:
* | The AF time wildcard for the current time. The PI System resolves this to the current server timestamp at the moment of writing. |
| Current | Resolves to the current local date and time, expressed as an absolute timestamp rather than an AF time expression. |
| Custom | Accepts a static AF time expression, such as *-1d (one day ago) or a specific date string. The expression is evaluated when the symbol loads. |
| Relative | Calculates the default timestamp by adding a fixed offset (for example, +1h or +1d) to the timestamp of the most recently stored value for that data source. Useful for creating regularly spaced entries. |
| Input Time | Sets the timestamp to the moment the operator last typed or modified a value in the row's Value cell. |
| Display Start Time | Pre-fills the timestamp with the current PI Vision display start time. |
| Display End Time | Pre-fills the timestamp with the current PI Vision display end time. |
Configure Multiple Input - Define the time intervals used to generate the input fields when Multiple input mode is active. For example, configure hourly intervals to create one input field per hour across the current shift.
- Transposed: When enabled, timestamps are displayed as rows and data sources as columns. When disabled (default), timestamps appear as columns.
- Start: Defines the anchor point from which intervals are calculated. When set to Day, intervals begin at midnight of the current day. When set to Hour, intervals begin at the top of the current hour (for example, if the current time is 04:36, intervals start at 04:00).
- Interval: The time duration between consecutive input fields.
- Offset: A time shift applied to the start anchor before intervals are calculated. Use this to align input slots to non-standard boundaries.
- Count: The number of input fields (intervals) to render in the table.
- DateTime Format: The format string used to display timestamps in the interval column headers.
- Start and End Times: Defines the time range used to bound the interval calculation. Intervals outside this range are not generated.
- Group: Assigns a group label to the interval set. Use this to visually separate interval blocks when multiple data sources with different interval configurations are displayed together.

- Allow Future: When enabled, input fields for future timestamps are shown. When disabled, the symbol only renders columns up to the current time.
- Under General, configure default display behavior for the table as a whole.
- Layout: Controls how column widths are sized. Manual allows the engineer to set widths explicitly. Fit Table Width distributes columns evenly across the symbol width. Fit Data sizes each column to its content.
- Column Headers: Toggles the visibility of column header labels.
- Column Filters: Toggles the visibility of the per-column filter input row.
- Pagination: When enabled, the table renders data in pages rather than as a single scrollable list. Useful for tables with a large number of data sources.
- Share Input Time: Check this box to make the time columns synchronized across all the data sources. Overrides the rows setting Share Input Time.
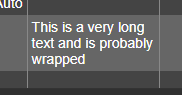
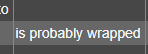
- Wrap Text: When enabled, cell content that exceeds the column width wraps to a new line within the cell. When disabled, overflow text is clipped.
Wrap Text ON Wrap Text OFF
- Hide Errors: When enabled, data sources returning system states (such as No Data or Pt Created) are hidden from the table rather than displaying the error string.
- Group: Groups rows in the table by one or more metadata fields: Attribute, Asset, Category, or Description. Grouping adds collapsible section headers to the table.
- Under Columns, select which columns to display in the table. Available columns are: Name, Description, Category, Path, PI Point, Asset, Attribute, Units, Last Time, Last Value, Value, and Time. For the editable columns (Value and Time), editing can be disabled individually by clearing the Allow Edit checkbox for that column.
- Under Toolbar, configure the appearance and available controls in the symbol's toolbar.
- Color: Sets the background color of the Save button.
- Text: Overrides the default Save button label with a custom string.
- Buttons: Controls which action buttons appear in the toolbar and allows individual button colors to be customized.
- Under Style, choose a Theme and Container Style. Tables do not offer Surface because the table owns its header and row surfaces. See Themes and container styles.
- Custom: Provides controls for table colors, fonts, borders, and row and header heights.
- Copy/Paste Custom Style: A Custom style can be transferred to another compatible Vision Library+ table. Select Copy on the source table, select the target table, and then select Paste.
- Under Export Data, configure export options. Operators can download the current table data in CSV, JSON, XLSX, or PDF format using the export button in the toolbar.
- Under Numbers, set the number display format applied to all numeric data sources in the table. The following format modes are available:
| Database | Respects the number format configured in the PI System for each data source:; • For PI points or PI AF attributes with a PI point data reference, the format depends on the value of the point's DisplayDigits attribute:; • Zero or positive numbers specify the number of digits to display; to the right of the decimal point.; • Negative numbers specify the number of significant digits.; • For PI AF attributes without a PI point data reference, numbers; show 5 significant digits.; All data items show the thousands separator. |
| General | Displays all significant digits, suppressing trailing zeros. Automatically switches to scientific notation for values greater than 1×10⁷ or less than 1×10⁻⁵. |
| Number | Applies a custom format defined by the engineer:; • Decimal Places; The number of digits shown after the decimal.; • Use 1000 separator; Select this check box to show the thousands separator in large numbers. |
| Scientific | Show numbers in the format 0.00E+00. |
Multi-State
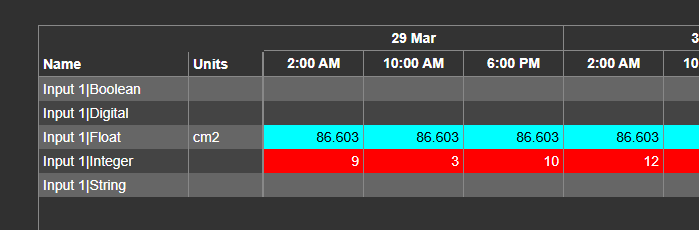
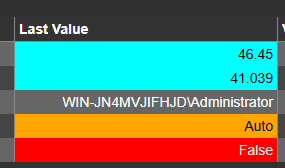
Multi-state formatting applies color coding to the Last Value and Value columns based on the data source’s configured limit ranges. Limit ranges can be sourced from Asset Framework Attribute Traits or defined directly within PI Vision. To enable multi-state formatting:
- Right-click the symbol on the display and select Add multi-state.
- In the configuration pane under Rows, select the target data source and enable the Enable Multi-State checkbox.
- If the data source is an AF Attribute with configured Attribute Traits, the limit ranges are populated automatically. For PI Points or attributes without configured traits, define static limit values manually.
Troubleshooting and limitations
- Check: If a value is rejected, check its data type, timestamp, validation limits, and write permission.
- Check: A saved write changes historical process data; follow your site's correction and audit procedure.



