



Vision Library+ / Data entry
Manual Input Table+
Manual Input Table+ combines historical values and editable rows in a table for controlled PI System data entry.
Overview
Manual Input Table+ combines historical values and editable rows in a table for controlled PI System data entry.
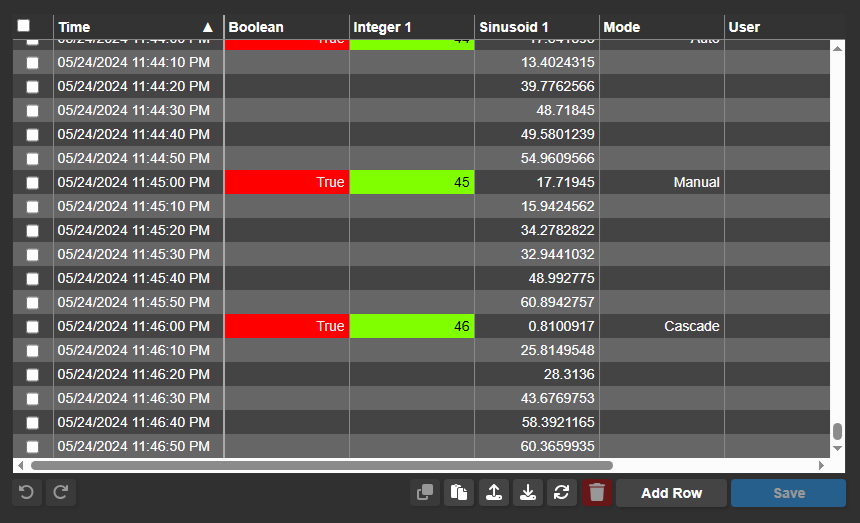
Watch the demo
See Manual Input Table+ in a practical PI Vision workflow.
When to use it
Use this symbol when you need to:
- Review and correct recorded values in context.
- Add, import, or paste multiple timestamped values.
Before you begin
- Prepare writable PI Points or AF attributes with the correct point types and security.
- Confirm validation, deletion, and audit requirements.
Preparing tags
Before adding the symbol to a display, confirm that the PI Points to be used are configured correctly. Two point attributes are critical:
- Compression: Disable compression on every PI Point used for manual data entry. If compression is left enabled, the PI compression algorithm may silently discard manually entered values that fall within the compression deadband.
- Step: Set the Step attribute to On for all numeric PI Points used for manual entry. Without this, the PI System interpolates values between recorded timestamps, which can cause other symbols displaying the same tag to show incorrect intermediate values.
Add and set up the symbol
- Select the symbol in the PI Vision symbol gallery.
- Add the required data sources or asset context to the display.
- Right-click the symbol and open its configuration pane.
- Configure the minimum data, range, and display settings for a useful result.
- Confirm that the symbol shows the expected data.
Use the symbol
Add or edit rows, review validation messages, then save the accepted changes. Save and delete actions modify PI System data and may require an audit reason.
How the data is loaded
On load, the symbol queries all configured data sources and collects every distinct timestamp across all of them. Each unique timestamp becomes one row. If two data sources both have a value at the same timestamp, those values appear side by side in the same row. If a data source has no value at a given timestamp, its cell in that row is empty.
Add new data
New values can be added in two ways: by inserting a new row, or by typing directly into an empty cell for an existing timestamp. To insert a new row:
- Click the Add Row button in the toolbar
- Enter values in the relevant cells. Leave a cell blank to skip that data source for this timestamp.
- Click the Save button
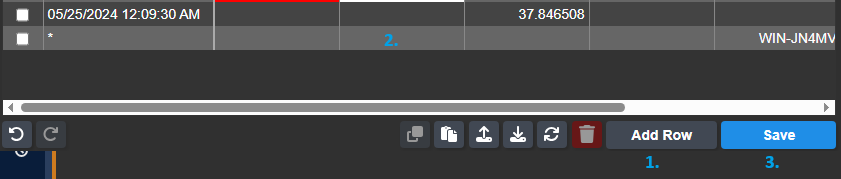
To add a value at an existing timestamp, click the empty cell for that timestamp and data source, type the value, then click Save.
Edit or delete data
To edit a value, click the cell, type the new value, then click Save. The updated value is written to the PI System on save.
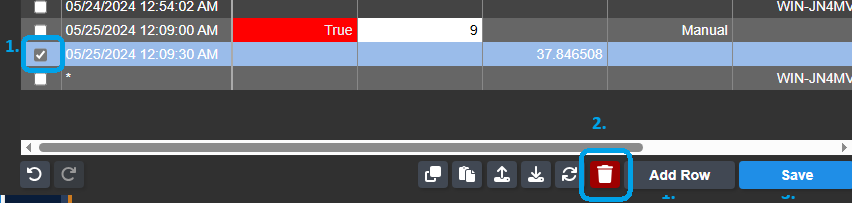
To delete data, either select the row using the row selection column and click the Delete button, or clear an individual cell by selecting it and deleting its value.
Input validation
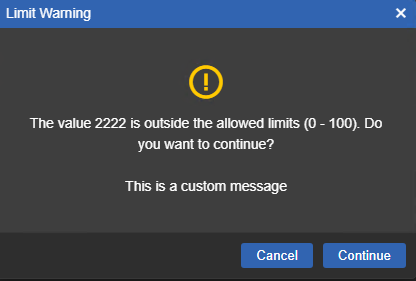
Input Validation can be enabled for any numeric data source. When enabled, the operator is shown a warning dialog if the value entered falls outside the configured valid range.
Limit Source: Choose between Database Limits and Custom Limits. When Database Limits is selected, the valid range is read from the Minimum and Maximum Attribute Traits defined in Asset Framework (for AF Attributes), or from the Zero and Span Point Attributes (for PI Points).
Prevent Entry Outside Limits: When enabled, the Save button is blocked if the entered value is outside the valid range, preventing the write to the PI System. When disabled, the warning is shown but the operator can still save the out-of-range value.
A custom message can be configured to appear in the validation dialog, providing operators with context-specific guidance (for example, specifying the expected value range or the reason for the limit).
Bulk import data
The table supports bulk data import from two sources: a CSV file upload, or data pasted directly from an Excel spreadsheet.
Prepare data
Prepare the source spreadsheet before importing. The recommended approach is to use the configuration menu to download the table's existing data as an .xlsx file - this guarantees the column structure is correct. If creating the spreadsheet from scratch, ensure it has one timestamp column followed by one column per data source, in the same order as the symbol's columns.
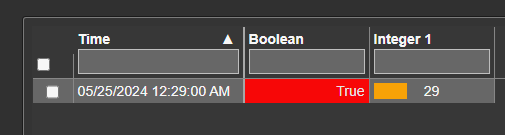
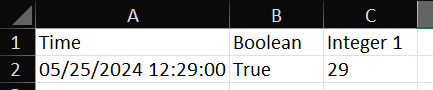
Populate the spreadsheet with the values to import.
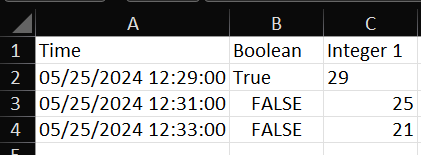
There are two ways to import the data into the table:
Copy & Paste
In Excel, select the data range to import, then right-click and choose Copy.
Important: Do not include the column header row in the selection.
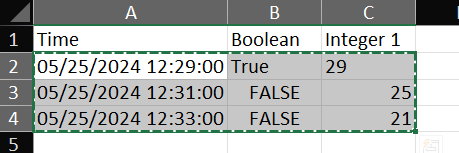
Click the Paste from Clipboard button in the table's toolbar.
The imported rows are applied to the table. Click Save to write the values to the PI System.
Upload as csv
Save the Excel spreadsheet as a .csv file. Click the Upload CSV button in the table's toolbar to select and upload the file. Click Save to write the values to the PI System.
Important: Ensure compression is disabled for all PI Points being written to before performing a bulk import. If compression is enabled, the PI compression algorithm may discard values that fall within the deadband, resulting in missing data.
Links
If a cell value is a URL, the table renders it as a clickable button. Clicking the button opens the URL in a new browser tab.
Configure the symbol
Overview and behavior
Manual Input Table+ is a spreadsheet-style symbol for adding, editing, and deleting values in the PI data archive. It supports multiple data sources displayed as side-by-side columns, with timestamps aligned into shared rows - functioning similarly to the PI SMT Archive Editor but within PI Vision and with support for multiple PI Points or AF Attributes in a single view.
General configuration
The Configuration pane provides access to all symbol settings, organised into sections covering table layout, column behavior, editing options, and styling.
- Right-click the symbol and select Configure Table to open the configuration pane.
- Under Table, configure settings that apply globally to the symbol.
- Layout: Controls how column widths are sized. Options are Fit Data (columns size to their content), Fit Table Width (columns expand to fill the symbol's width), and Manual (the display engineer resizes each column by dragging). Manual column widths are persisted when the display is saved.
- Range Selection: When enabled, the table supports spreadsheet-style range selection, allowing operators to select and copy multiple cells at once. When this mode is active, a double-click is required to enter cell edit mode.
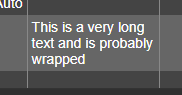
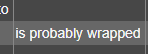
Wrap Text: When enabled, cell content that exceeds the column width wraps to the next line rather than being truncated.
Wrap Text ON Wrap Text OFF
Paging: When row count exceeds the visible table height, controls whether the table uses pagination or vertical scrolling. Not available when Wrap Text is enabled.
- Row Selection: Shows or hides the row selection column. When visible, operators can select multiple rows to delete or copy them in bulk.
- Right to Left: Renders all table text in right-to-left reading order. Use for Arabic, Hebrew, or other RTL language deployments.
- Under Header, configure the appearance and behavior of column headers.
- Show: Toggles the visibility of the column header row.
Column Filters: When enabled, displays a filter input beneath each column header. Operators can type to filter the table rows in real time.

- Under Time, configure the timestamp column's display and edit behavior.
- Show: Toggles the visibility of the timestamp column.
- Allow Edit: Controls whether operators can modify the timestamp of an existing row.
- Datetime Format: Controls timestamp display precision. Default excludes milliseconds; Exact includes them.
- Pin Time Column: When the table has more columns than can be displayed without horizontal scrolling, keeps the timestamp column fixed in place while the data columns scroll.
- Under Editing, configure the symbol's data entry and write behavior.
- Allow Adding New Rows: When enabled, displays the Add Row button in the toolbar. Disabling this setting prevents operators from writing new timestamps to the PI System through this symbol.
The Default Time setting defines the timestamp pre-filled when the operator clicks Add Row.
- Default Time: Specifies the initial timestamp value shown when a new row is added.
- Copy / Paste: Enables the ability to copy cell values and paste them into other cells within the table.
- Skip Time Column: When enabled, paste and bulk upload operations ignore the timestamp column and write only to the data value columns. Useful when the source data does not include a time column.
- Existing Data Rule: Determines the behavior when an operator submits a value at a timestamp that already has a recorded value in the PI System. Options:
- Replace Existing - The existing value at that timestamp is overwritten with the new value.
- Add as Duplicate - A second value is written at the same timestamp. The PI System stores both; the most recent write is returned as the current value.
- Protect Existing - The save is blocked if a value already exists at the target timestamp. The operator must choose a different timestamp or delete the existing value first.
- Limit Changes: When enabled, restricts editing and deletion to values within a defined recency window. The maximum age of values that can be modified is set in the Max. Age field. Values older than this threshold are read-only.
Configure data retrieval
The Data Retrieval section controls the time range used to query the PI System and how the table's data is refreshed.
- Data Update Mode: Determines how the table's data is refreshed after initial load. Options:
| Manual | Data is not refreshed automatically. The table reloads only when the display's time range changes, or when the operator clicks the reload button. |
| Auto (Interval) | The table refreshes its entire dataset at the PI Vision display's configured update interval. |
| Auto (Event-Based) | Only the individual cells whose values have changed in the archive are updated. The full table dataset is not re-queried on each cycle, making this the most efficient mode for stable datasets with occasional updates. |
- Start and End Times: Defines the time range used to retrieve archived data. Options:
| Display time range | The table loads data for the current PI Vision display's time range. Changing the display time range automatically reloads the table. |
| Custom time range | A fixed start and end time is specified independently of the display time range. |
| Duration and offset | The time range is defined as a duration and an offset from the display's End Time. For example, a duration of 8 hours with no offset loads the 8 hours ending at the display's current end time. |
Configure toolbar
The Toolbar section controls the appearance of the toolbar and the Save button.
- Color: Sets the background color of the Save button.
- Text: Overrides the default Save label with custom text.
- Buttons: Controls which action buttons are visible in the toolbar and allows their colors to be customized.
Configure style
Under Style, choose a Theme and Container Style. Tables do not offer Surface because the table owns its header and row surfaces. See Themes and container styles.
- Custom: Provides controls for table colors, fonts, borders, and row and header heights.
- Copy/Paste Custom Style: A Custom style can be copied from one table and applied to another compatible Vision Library+ table. Select Copy on the source table, select the target table, and then select Paste.
Configure number format
The Numbers section sets the display format for all numeric data sources in the table. Options:
| Database | Show numbers in a format that depends on the data item:; • For PI points or PI AF attributes with a PI point data reference, the format depends on the value of the point's DisplayDigits attribute:; • Zero or positive numbers specify the number of digits to display; to the right of the decimal point.; • Negative numbers specify the number of significant digits.; • For PI AF attributes without a PI point data reference, numbers; show 5 significant digits.; All data items show the thousands separator. |
| General | Show all significant digits for numbers except for trailing zeros. If the absolute value of the number is greater than 1x10⁷ or less than 1x10⁻⁵, the format will switch to use scientific notation. |
| Number | Show numbers in the custom format that you specify:; • Decimal Places; The number of digits shown after the decimal.; • Use 1000 separator; Select this check box to show the thousands separator in large numbers. |
| Scientific | Show numbers in the format 0.00E+00. |
Data source configuration
The Columns section configures each PI Point or AF Attribute added to the symbol. The following properties can be set per data source:
- Label: Controls the column header text for this data source. Choose from attribute name, asset name, and/or PI Point name.
- Show Units: When enabled, appends the unit of measure to each cell value in this column.
- Hidden: Hides this data source's column from the table. The timestamp column remains visible regardless of this setting.
- Allow Edit: Controls whether operators can add, edit, or delete values for this data source. Uncheck to make the column read-only.
- Alignment: Sets the horizontal alignment of cell values in this column. Options: Left, Center, Right.
- Prefilled Value: Sets the default value pre-populated in this column when a new row is added. Options:
| None | The cell is left blank on load and after each save. |
| User | Automatically pre-fills the cell with the logged-in operator's PI Vision user name. Supported for string-type PI Points only. |
| Last Value | Pre-fills the cell with the most recently saved value for this data source. |
| Custom | Pre-fills the cell with a fixed value specified by the display engineer. |
Multi-State
Multi-State formatting colors the value cells in the table based on limit thresholds defined in Asset Framework or configured directly in PI Vision. To enable Multi-State:
- Right-click the symbol and select Add multi-state
- In the Rows section, select the data source row and check the Enable Multi-State checkbox.
- Choose the visual property to which the state color will be applied:
| Fill | 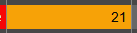 | Applies the state color to the cell background. |
| Text | 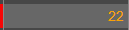 | Applies the state color to the cell's text. |
| Badge |  | Displays a colored badge around the cell value. |
| Progress | 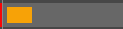 | Renders a colored progress bar in the cell. The bar scale is derived from the data source's Span and Zero point attributes (or AF equivalent min/max traits). |
| Progress & Value |  | Displays both the numeric cell value and the colored progress bar. |
- If the data source is an AF Attribute with configured limit traits, the threshold values are populated automatically. For PI Points or attributes without traits, define the static limits manually in the Multi-State configuration.
Troubleshooting and limitations
- Check: If an edit fails, check the point type, timestamp, validation limits, and write permission.
- Check: Edits and deletions change historical data; follow your site's audit and correction procedure.



